Albums
The Albums tab is where you browse your curated photo collection - organized albums AI creates after Auto Curation.
New uploads land in the Upload tab first. After curation, photos move into curated albums here.
On this page
- What Albums is
- Layout
- Folder structure
- Browse and navigate
- Create a new album
- Select photos and albums
- Cut, copy, and paste photos
- Move albums
- Delete photos and albums
- Download photos
- Download an album
- Set album cover
- Other album actions
- Open a photo
- Keyboard shortcuts (web)
- Tips
What Albums is
After Auto Curation runs, Eyedeea does most of the organizing for you - roughly four out of five photos land in the right place with AI-generated album names, suggested covers, and a structure that mirrors real life: years, trips, and milestones.
The remaining work is yours, and it is optional: browse what the AI created, rename albums that do not feel right, move or merge folders, cut, copy, and paste photos between albums, download or sync albums to your device, set album covers, and clean up anything that still needs a human touch.
Think of Albums as your curated home base - AI gets you most of the way there; you finish the story your way before sharing or opening View.
Layout
Web (desktop, laptop, or mobile browser):
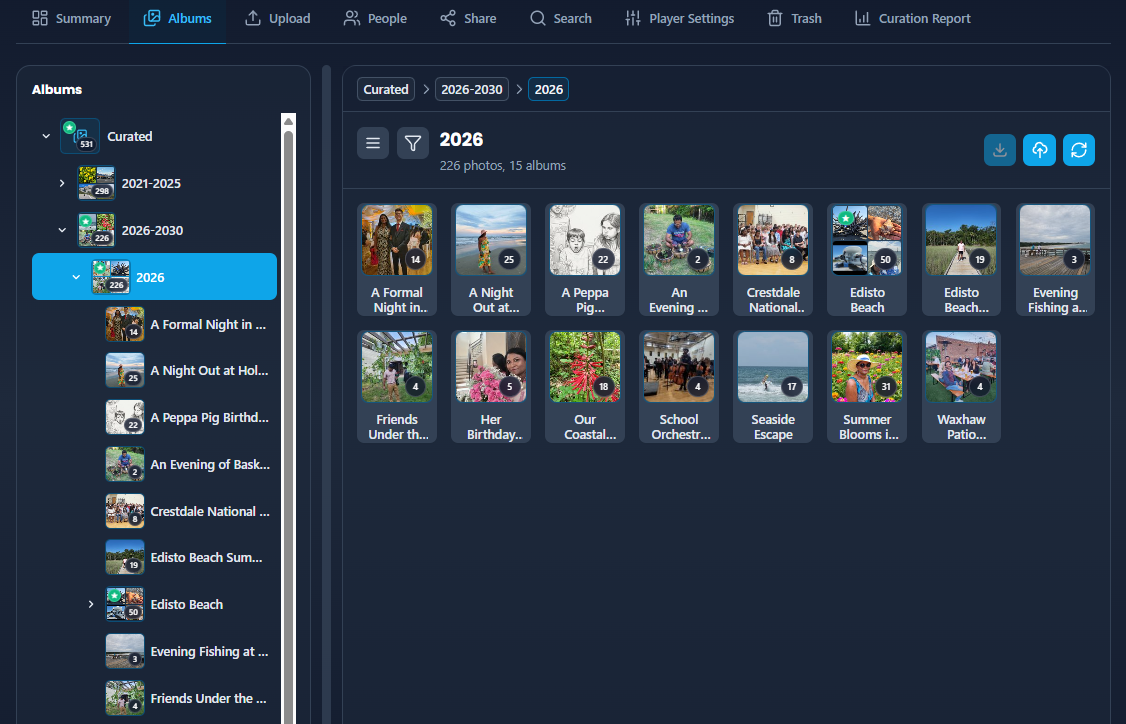
- A folder tree on the left shows your curated hierarchy with cover thumbnails and photo counts.
- The main grid shows subfolder album tiles and photo thumbnails for the folder you have open.
- A toolbar above the grid offers breadcrumbs, grid/detail toggle, selection counts, and bulk actions.
Android app:
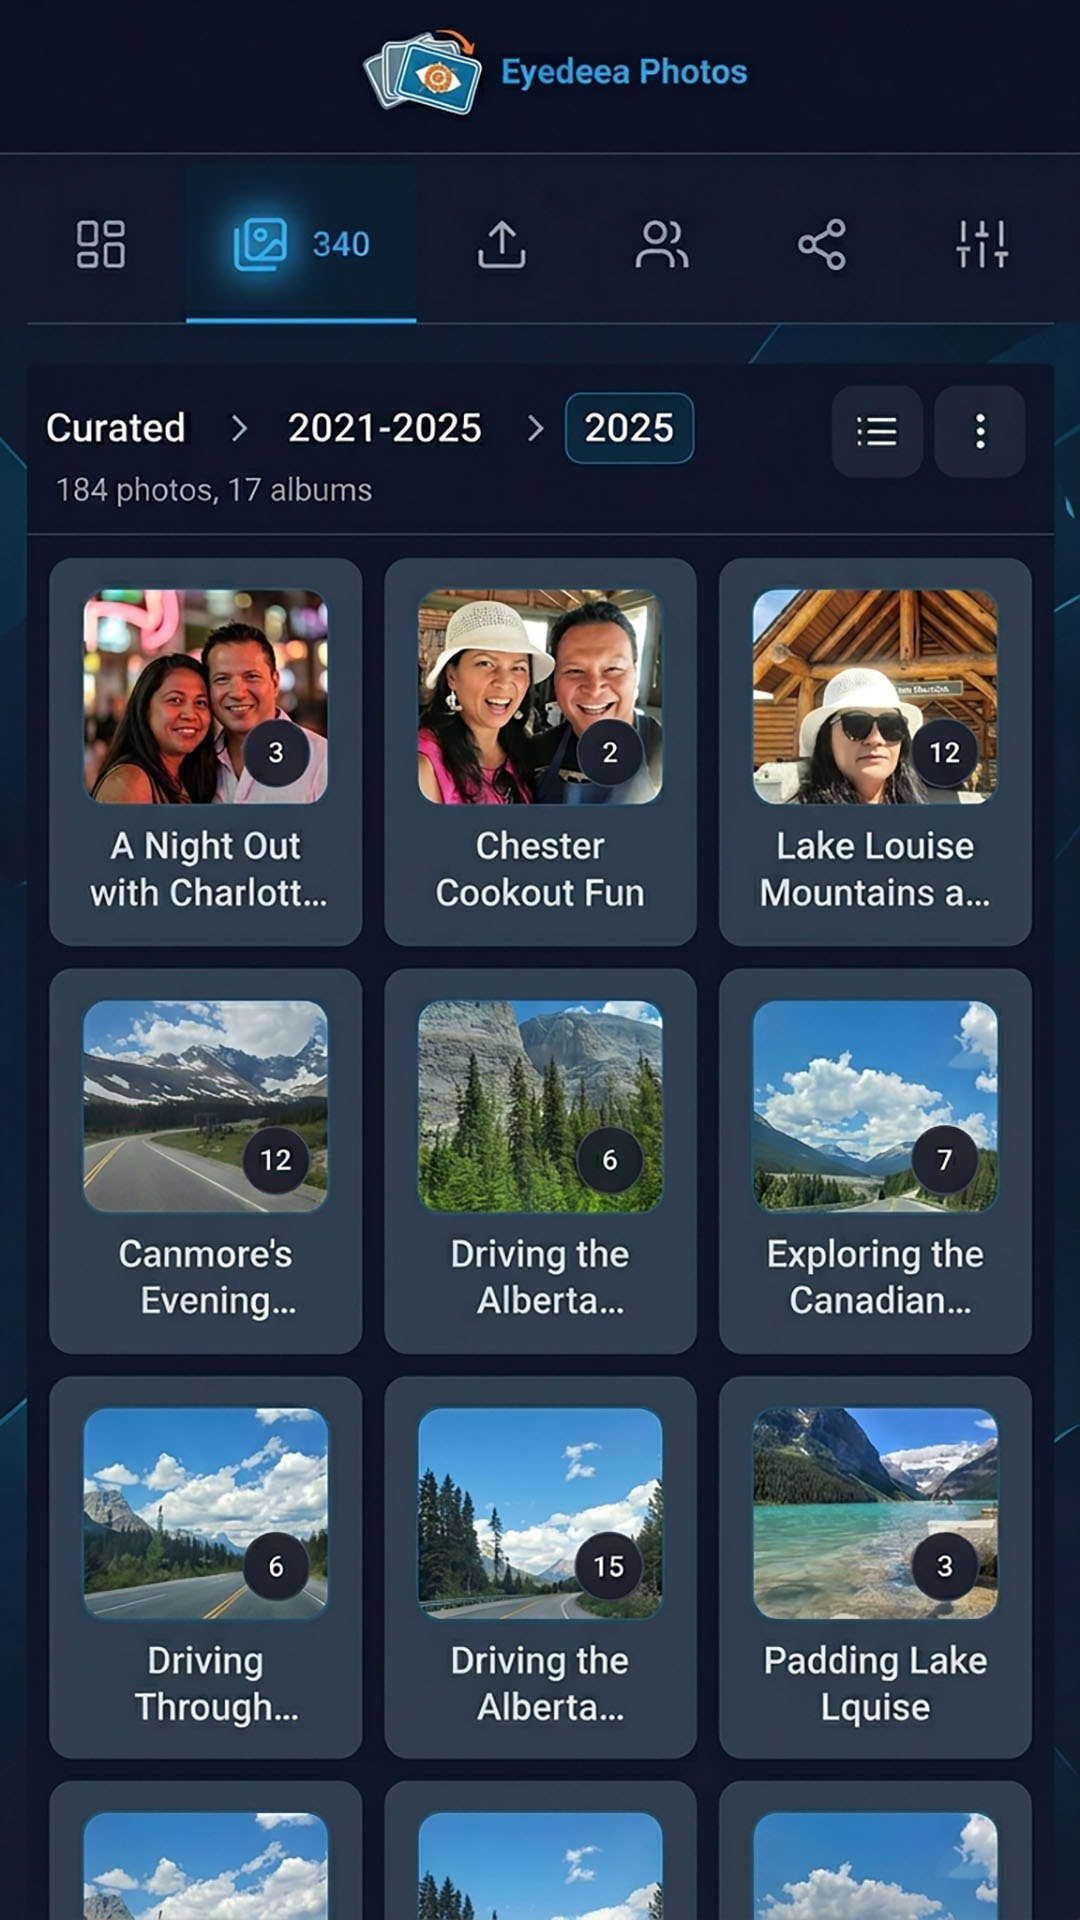
- No left folder tree - instead you get destination chips, breadcrumbs, and album tiles in the main grid.
- Long-press a photo or album to enter select mode; a bottom action bar appears for bulk actions.
Folder structure
Eyedeea organizes your curated library in layers that match how you remember trips and milestones:
| Level | Example | Notes |
|---|---|---|
| Year range | 2021-2025 | Groups multiple years |
| Year | 2026 | Single calendar year |
| Album group | Summer Trip to Banff | A logical group of related albums from one trip or theme |
| Album | Banff, Jasper, Calgary | Individual albums with photos inside |
For example, a Summer Trip to Banff album group might contain separate albums for Banff, Jasper, and other stops along the way.
Each album gets a suggested cover photo from AI ranking. You can change it anytime. When you download or sync albums on Android, Eyedeea keeps the same album names on your device.
Browse and navigate
Web:
- Single-click a folder in the tree or grid to open it.
- Double-click an album tile in the grid to open it quickly.
- Use breadcrumbs above the grid to jump back to a parent folder.
- Toggle grid vs detail list view from the toolbar.
- Use the filter icon to narrow visible albums by keywords.
Android app:
- Tap an album tile or breadcrumb to navigate.
- Long-press a photo or album to enter select mode (see Select photos and albums).
Cleanup folders (Duplicates, Blurry, Sensitive, Trash) appear under Albums on desktop when items need review. On Android they become separate Library tabs - see Cleanup.
Create a new album
Add a manual album inside an existing year or album group.
Web:
- Right-click a year folder or album group (not the top level of Albums, and not an album that already contains photos).
- Choose Add New Album.
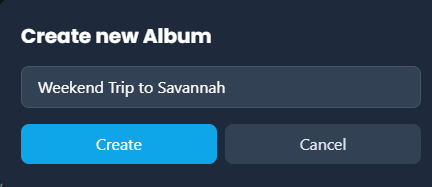
- Enter a name in the Create new Album dialog and confirm.
Android app:
- Long-press or open the overflow menu on a year folder or album group.
- Choose Add New Album and enter a name.
Restrictions:
- You cannot create albums at the top level of the Albums tab.
- Year folders accept new albums only - not loose photos dropped directly into the year.
Select photos and albums
Web:
| Action | How |
|---|---|
| Select one photo | Click a thumbnail |
| Add or remove from selection | Ctrl+click (Windows) or Cmd+click (Mac) |
| Select a range | Shift+click |
| Select all photos in folder | Ctrl+A / Cmd+A |
| Select albums | Ctrl+click / Cmd+click album tiles in the grid or tree (same parent only) |
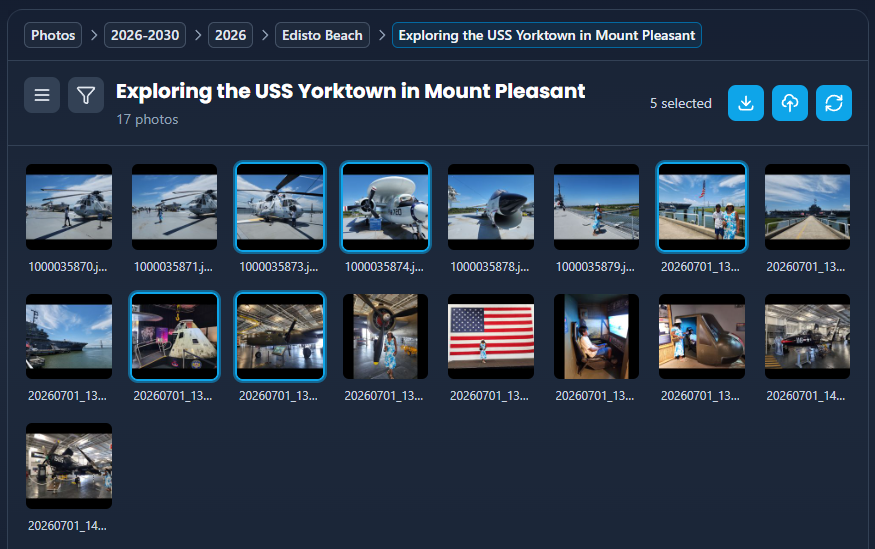
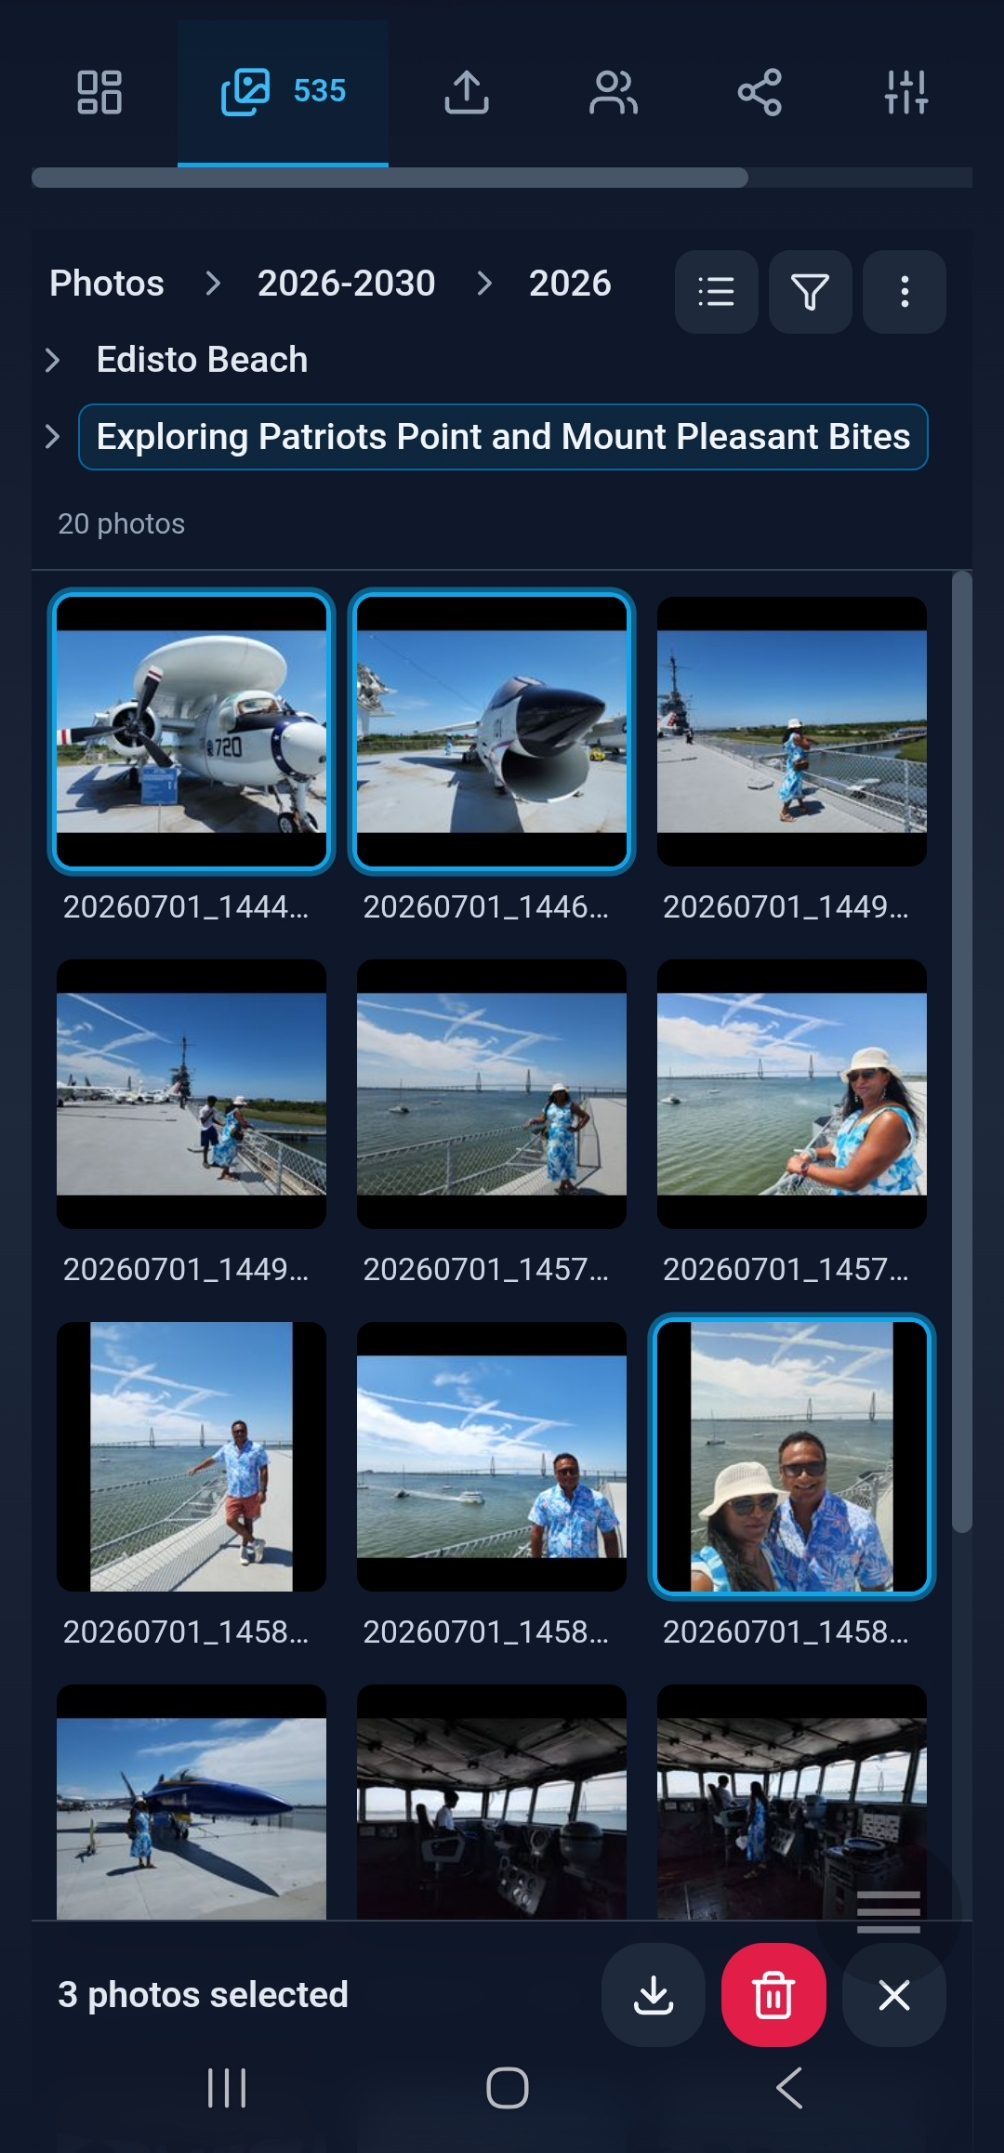
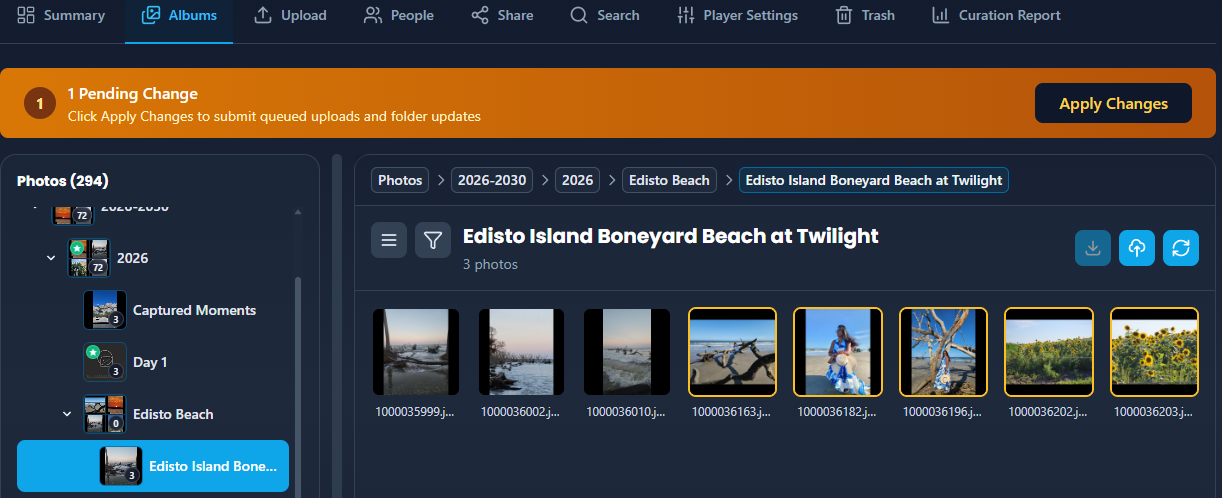
Selected photos show a sky-blue ring. Selected album tiles highlight in amber.
Android app:
- Long-press a photo or album to enter select mode.
- Tap additional items to add or remove them from the selection.
- Use the bottom action bar for download, trash, and other bulk actions.
Cut, copy, and paste photos
Move or duplicate photos between albums using the clipboard.
Web:
| Action | Shortcut | Menu |
|---|---|---|
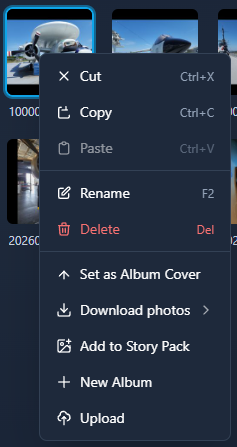
| Cut | Ctrl+X / Cmd+X | Right-click photo → Cut |
| Copy | Ctrl+C / Cmd+C | Right-click photo → Copy |
| Paste | Ctrl+V / Cmd+V | Right-click in destination folder → Paste |
Android app:
Use the photo context menu or overflow actions for Cut, Copy, and Paste when available.
How it works:
- Cut or copy selected photos - a toast says Pick a destination to paste.
- Navigate to the destination album (or use the folder picker for cross-folder paste).
- Paste - the operation is queued in the Pending operations banner.
- Click Apply on the banner to commit all queued moves, copies, and deletes.
Cut, copy, and paste are not available in the Upload tab, during background library jobs, or in Duplicates/Blurry/Sensitive review mode.
Move albums
Move entire albums between year folders or album groups.
Web and Android:
- Select one or more individual albums (not year folders, year ranges, or album groups).
- Cut with Ctrl+X / Cmd+X or the folder context menu.
- Open a valid destination - a year folder or album group (not the top level of Albums or a year-range folder).
- Paste with Ctrl+V / Cmd+V or the folder context menu.
Album moves run immediately - they do not use the pending operations banner. Copy album is not supported - only cut and paste.
Delete photos and albums
Delete photos:
- Select photos and press Delete, or choose Delete from the right-click menu.
- Photo deletes are queued - click Apply on the pending operations banner to move them to Trash.
Delete albums:
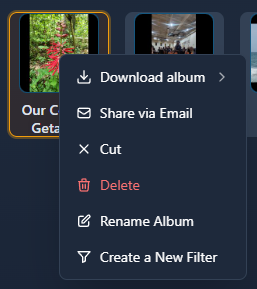
- Select an individual album and press Delete, or choose Delete from the folder context menu.
- The album is removed and its photos move to Trash.
Delete year or range folders:
- Only when the folder is empty - otherwise Eyedeea warns you.
Trash:
- Deleted photos land in Trash for review before permanent removal. See Cleanup.
Download photos
Download selected photos from an album.
Web and Android:
- Select one or more photos (or use the context menu on a selection).
- Choose Download photos and pick a quality: small, medium, or original (plan may gate original quality).
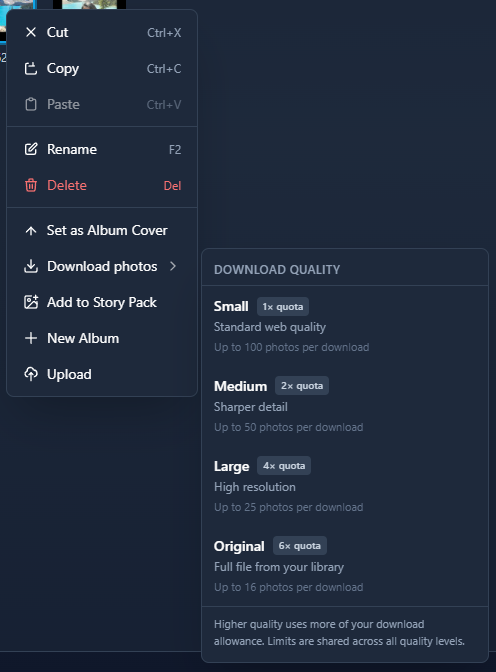
| Selection size | What you get |
|---|---|
| 1 to 5 photos | Individual files download one by one |
| More than 5 photos | A single ZIP archive |
The same rule applies whether you download from the context menu or the selection toolbar.
Download an album
Save every photo in an album at once - or keep it on your phone for offline use.
Web (desktop, laptop, or mobile browser):
- Right-click an album.
- Choose Download album and pick a quality.
- Eyedeea downloads all photos in the album using the same rule as photo downloads: individual files for 5 or fewer, ZIP for more.
Requires Download permission on your household membership.
Android app - offline sync:
On Android you can sync an album to your device so photos stay available in your native gallery even without a network connection. This is different from a one-time ZIP download on the web.
- Long-press an album (or open the album context menu).
- Choose Sync to device.
- Wait for the sync to finish - Eyedeea downloads the album in the background.
- Open your phone's Gallery app to view synced photos alongside your camera roll.
Synced albums keep the same album names Eyedeea uses in your library. You can sync an individual album or an entire album group (for example, all albums under Summer Trip to Banff). Re-syncing the same album updates photos without creating duplicates.
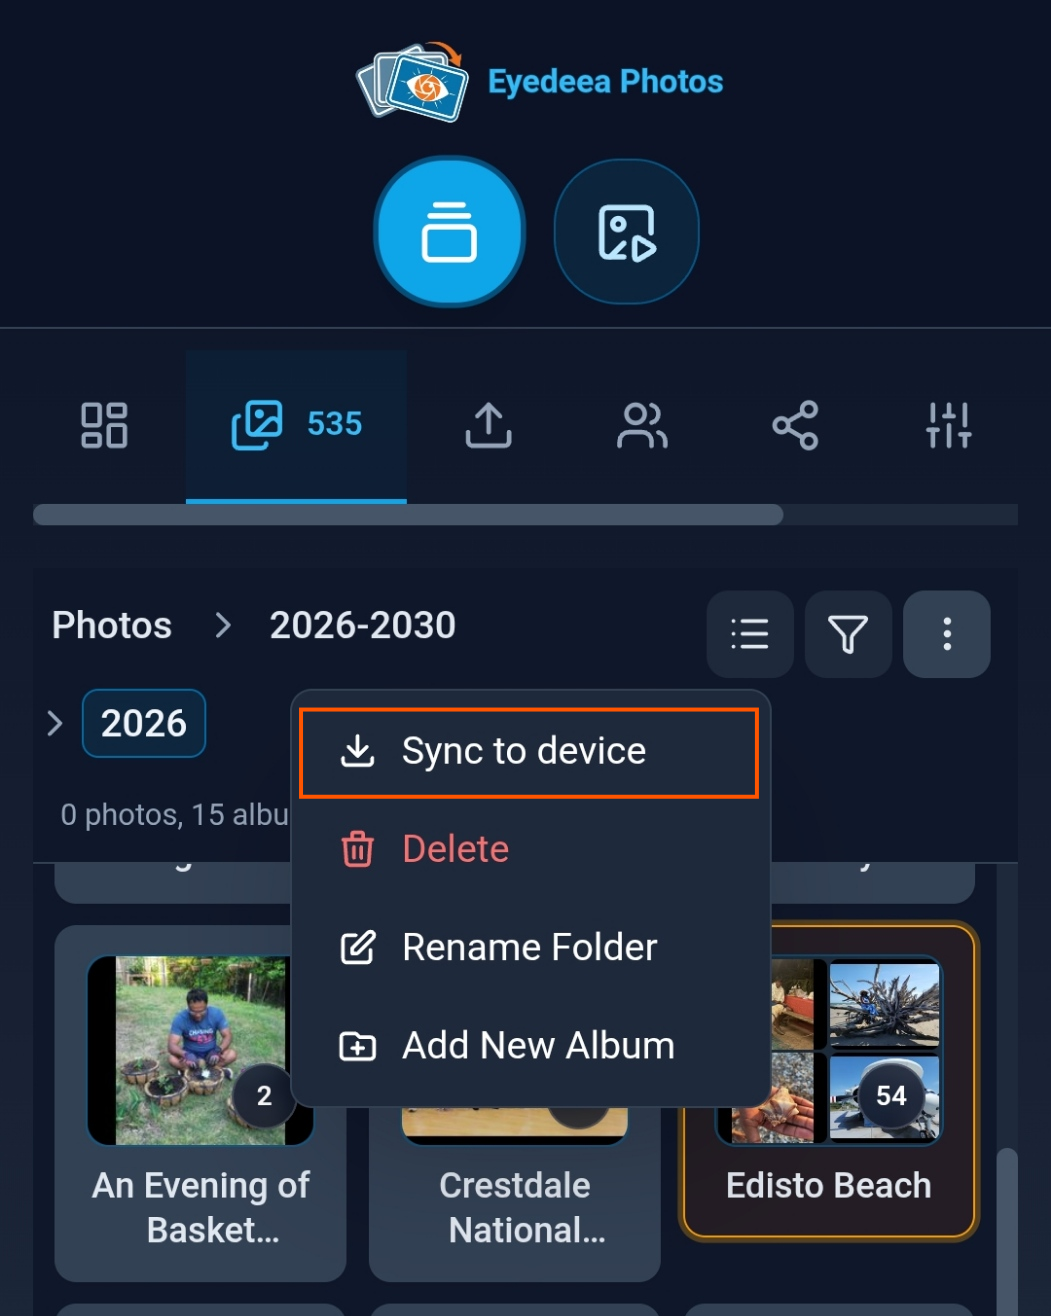
For more about offline use on Android, see Android.
Set album cover
Change which photo represents an album in the folder tree and album tiles.
Web and Android:
- Open an individual album (one that contains photos).
- Select exactly one photo.
- Right-click (or open the context menu) and choose Set as Album Cover.
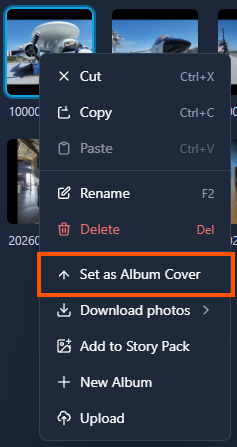
The new cover appears on album tiles and in the left folder tree. If the chosen photo is sensitive, Eyedeea may blur the cover thumbnail for privacy.
Other album actions
Available from the folder context menu or toolbar when conditions are met:
| Action | When available |
|---|---|
| Rename Album/Folder | Single folder; not year or year-range folders. F2 on web. |
| Merge Albums | Two or more individual albums selected. |
| Share via Email | Single album. |
| Upload | Into an open year or album group (not the top level of Albums). |
| Create a New Filter | Single album - saves a Player Settings filter. |
| Add Missing Year | On year-range folders when a calendar year is missing. |
| Sync to device | Android app only - sync album or album group to your native gallery. See Download an album. |
Open a photo
Inspect a single photo in the full-screen Photo Viewer.
Web:
- Double-click a photo thumbnail.
Android app:
- Double-tap a thumbnail (when not in select mode). The first tap selects; the second tap opens the viewer.
From the viewer you can navigate the album, use the bottom toolbar, and open the Photo Info panel for metadata, Refresh Vision, and people management.
Keyboard shortcuts (web)
Shortcuts apply when focus is not in a text field and no modal is open.
| Key | Action |
|---|---|
| Ctrl+C / Cmd+C | Copy selected photos |
| Ctrl+X / Cmd+X | Cut photos, or cut selected albums if no photos selected |
| Ctrl+V / Cmd+V | Paste photos or albums |
| Ctrl+A / Cmd+A | Select all photos in current folder |
| Delete | Delete selected photos or albums |
| F2 | Rename single selected folder |
| Esc | Close open menus |
Tips
- Album names come from time, place, and scene - rename anything that does not feel right.
- Use Search when you know what you want but not which album it is in.
- For duplicates, blurry shots, and sensitive content, use the dedicated cleanup areas - see Cleanup.
- Right-click photos to Add to Story Pack - see Share.